Introduction to R Markdown
A useful feature within the R ecosystem is R Markdown. R Markdown (or .Rmd) files allow a user to intersperse notes with code providing a useful framework for sharing scientific reports in a transparent and easily reproduceable way. They combine both markdown syntax for styling notes and Rscripts for running code and producing figures. Reports can be output in a variety of file formats including HTML documents, PDF documents, and even presentation slides.
Installing R Markdown
- To start let’s make a simple R Markdown file with Rstudio, you will need to install the R Markdown package from cran.
# install R Markdown
install.packages("rmarkdown")
R Markdown basics
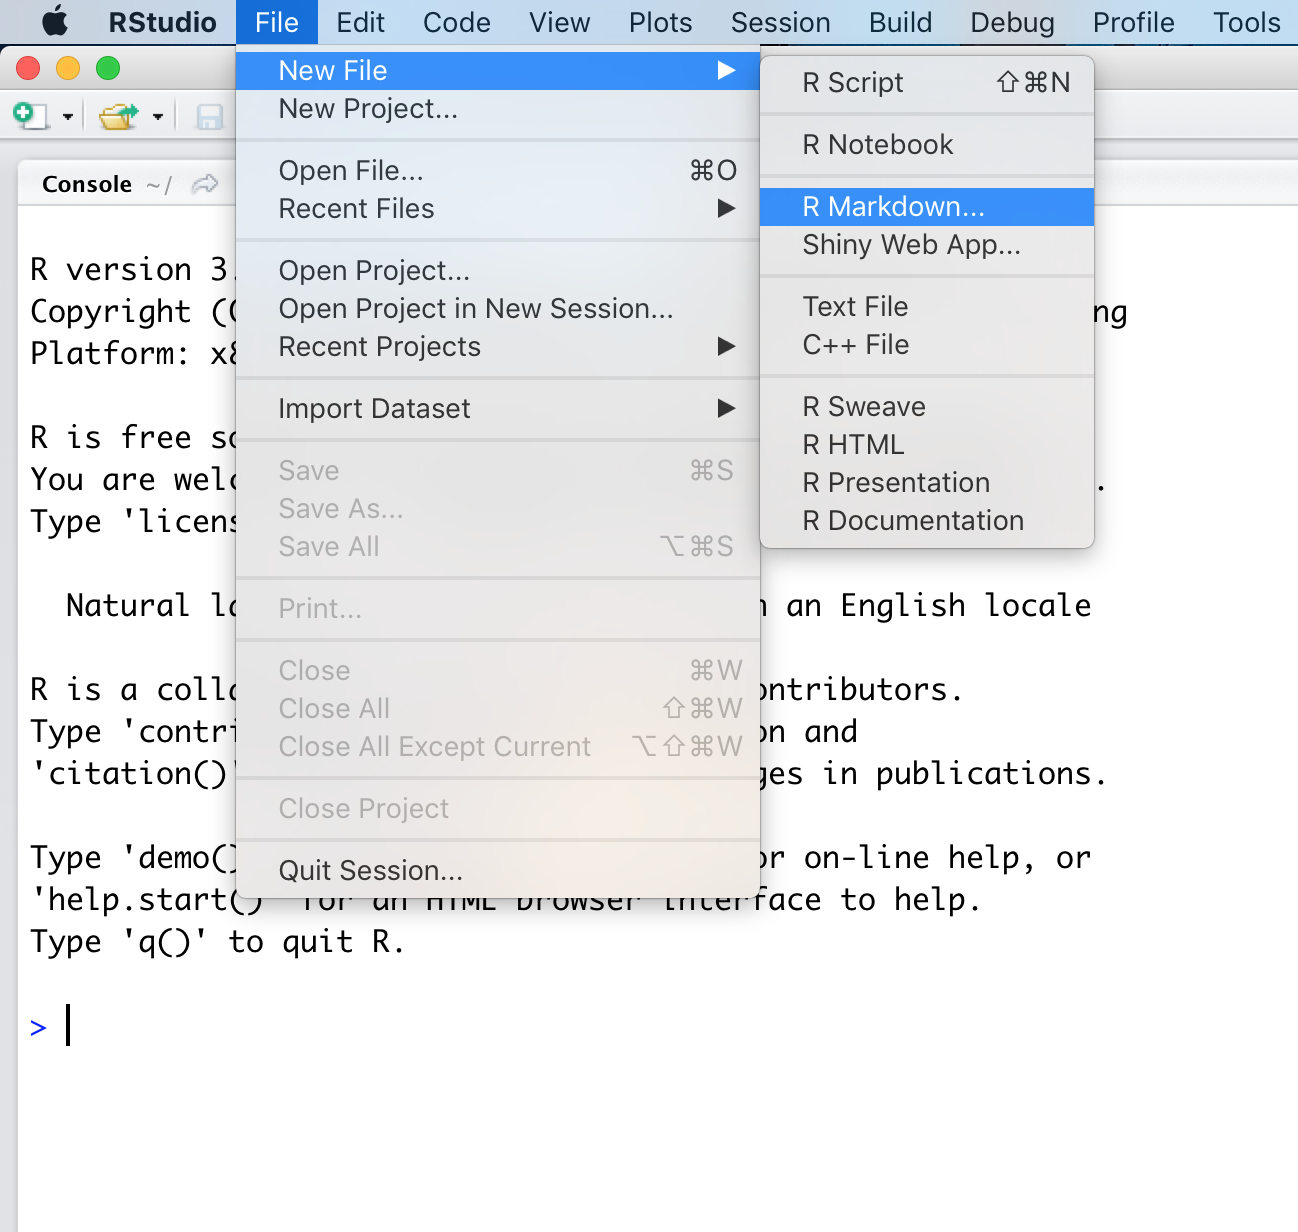
- Once R Markdown has been installed we can select File -> New File -> R Markdown to create an intial rmarkdown template.

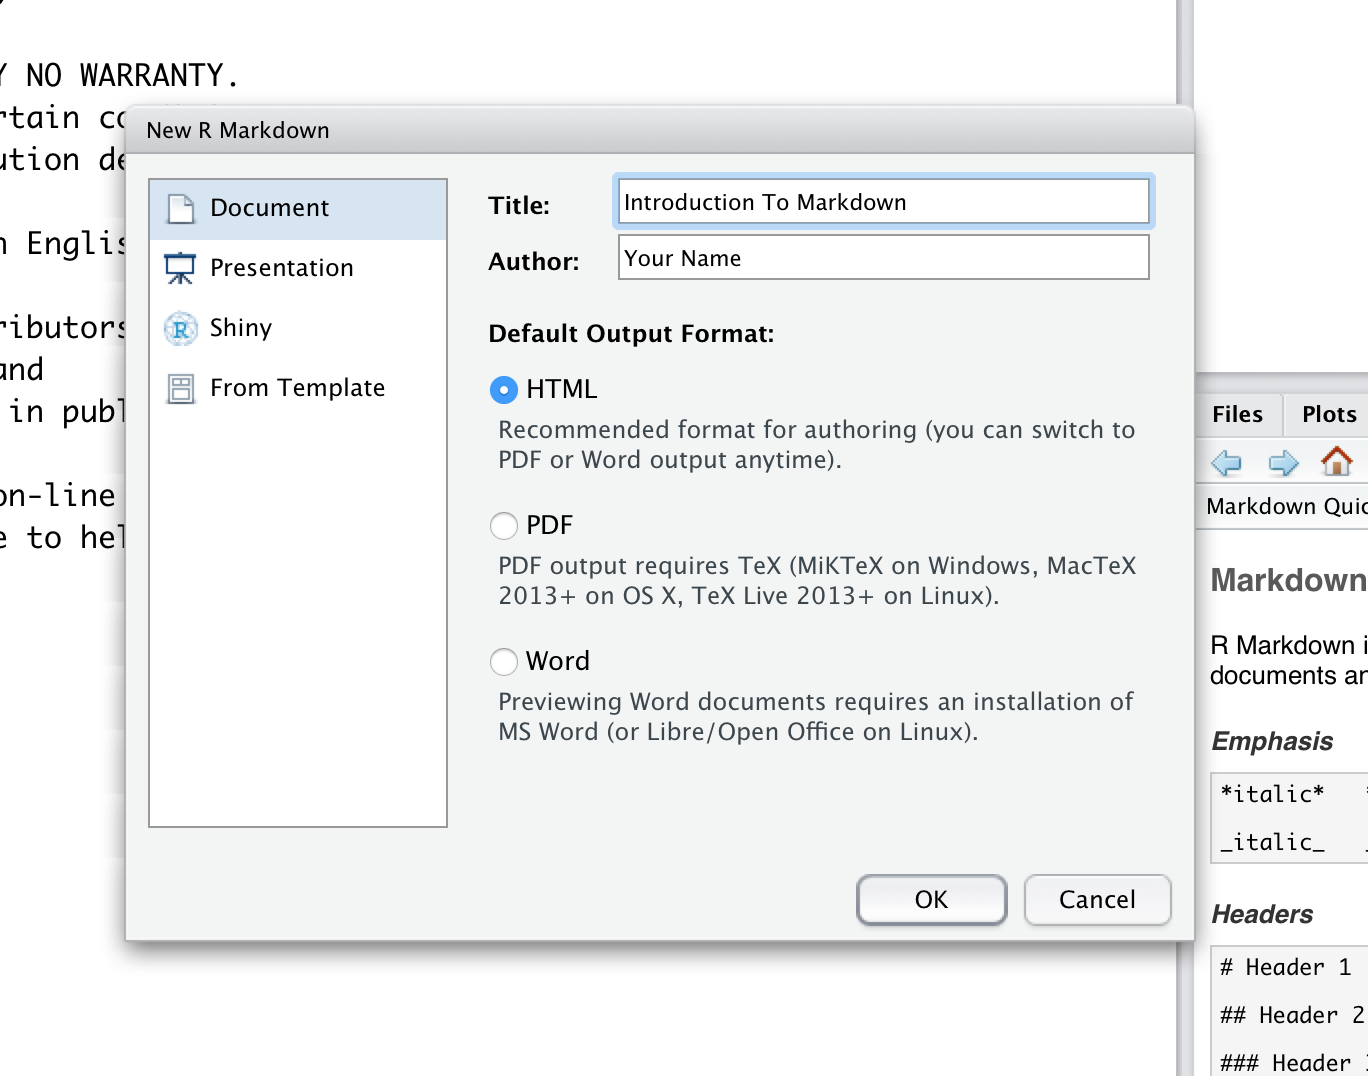
- Rstudio will ask you to choose an output format, and to add a title and author, for now we will just use the default HTML format however this can be changed at any time within the Rmarkdown template.
- Go ahead and select okay when you have added your name and a title.

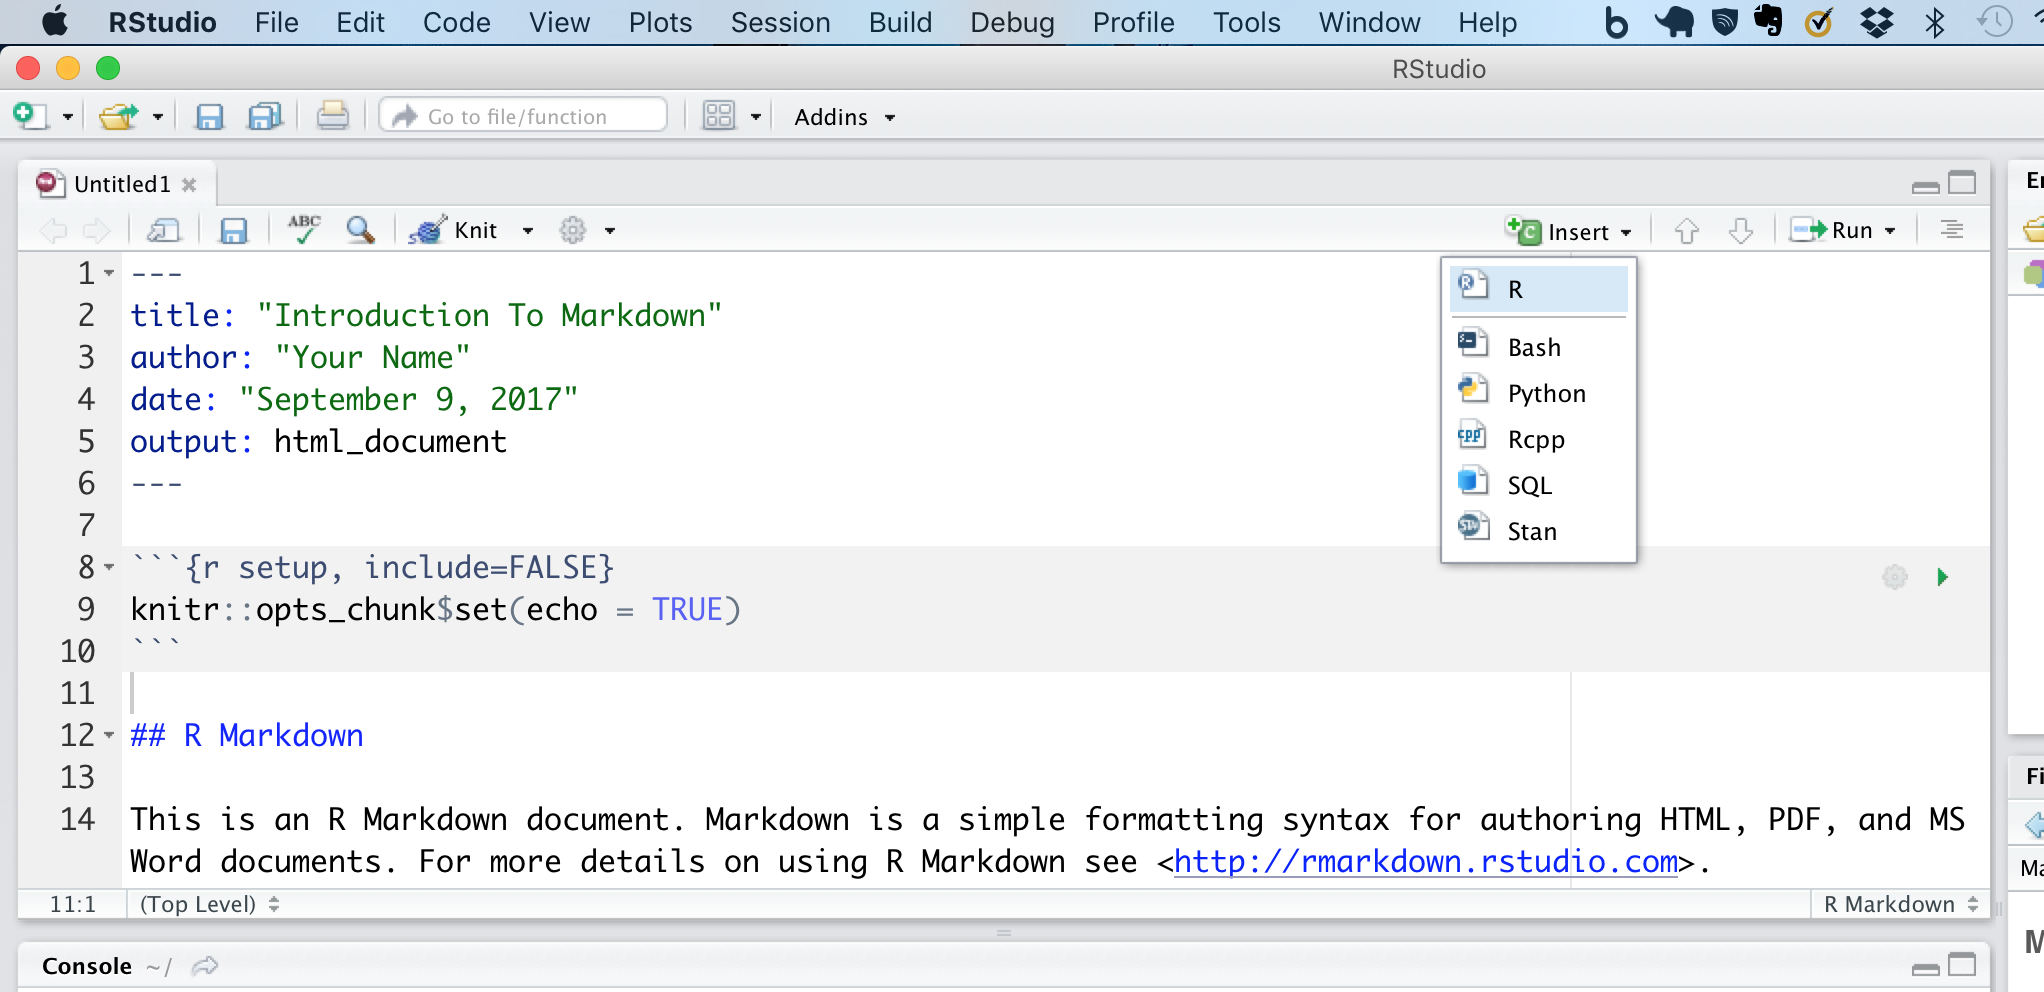
Rstudio should now have made a template for us, let’s go over a few introductory topics related to this template. At the top of the file you will see what looks like a YAML header denoted by ---. This is where the defaults for building the file are set.
You will notice that R Markdown has pre-populated some fields based on what we supplied when we initalized the markdown template. You can output the R Markdown (.Rmd) document using the Knit button in the top left hand corner of RStudio. This is the same as calling the function render() which takes the path to the R Markdown file as input. This file should end in a .Rmd extension to denote it as an rmarkdown file, though Rstudio will take care of this for you the first time you hit Knit.
Rstudio also has a convenient way to insert code using the insert button to the right. You might notice that not only does rmarkdown support R, but also bash, python and a few other languages as well. Though in order to work, these languages will need to be installed before using Knit.
- Go ahead and hit the
Knitbutton just to see what an R Markdown output looks like with the default example text. If you are working with the default HTML option the result will load in a new RStudio window with the option to open it in your usual web browser.

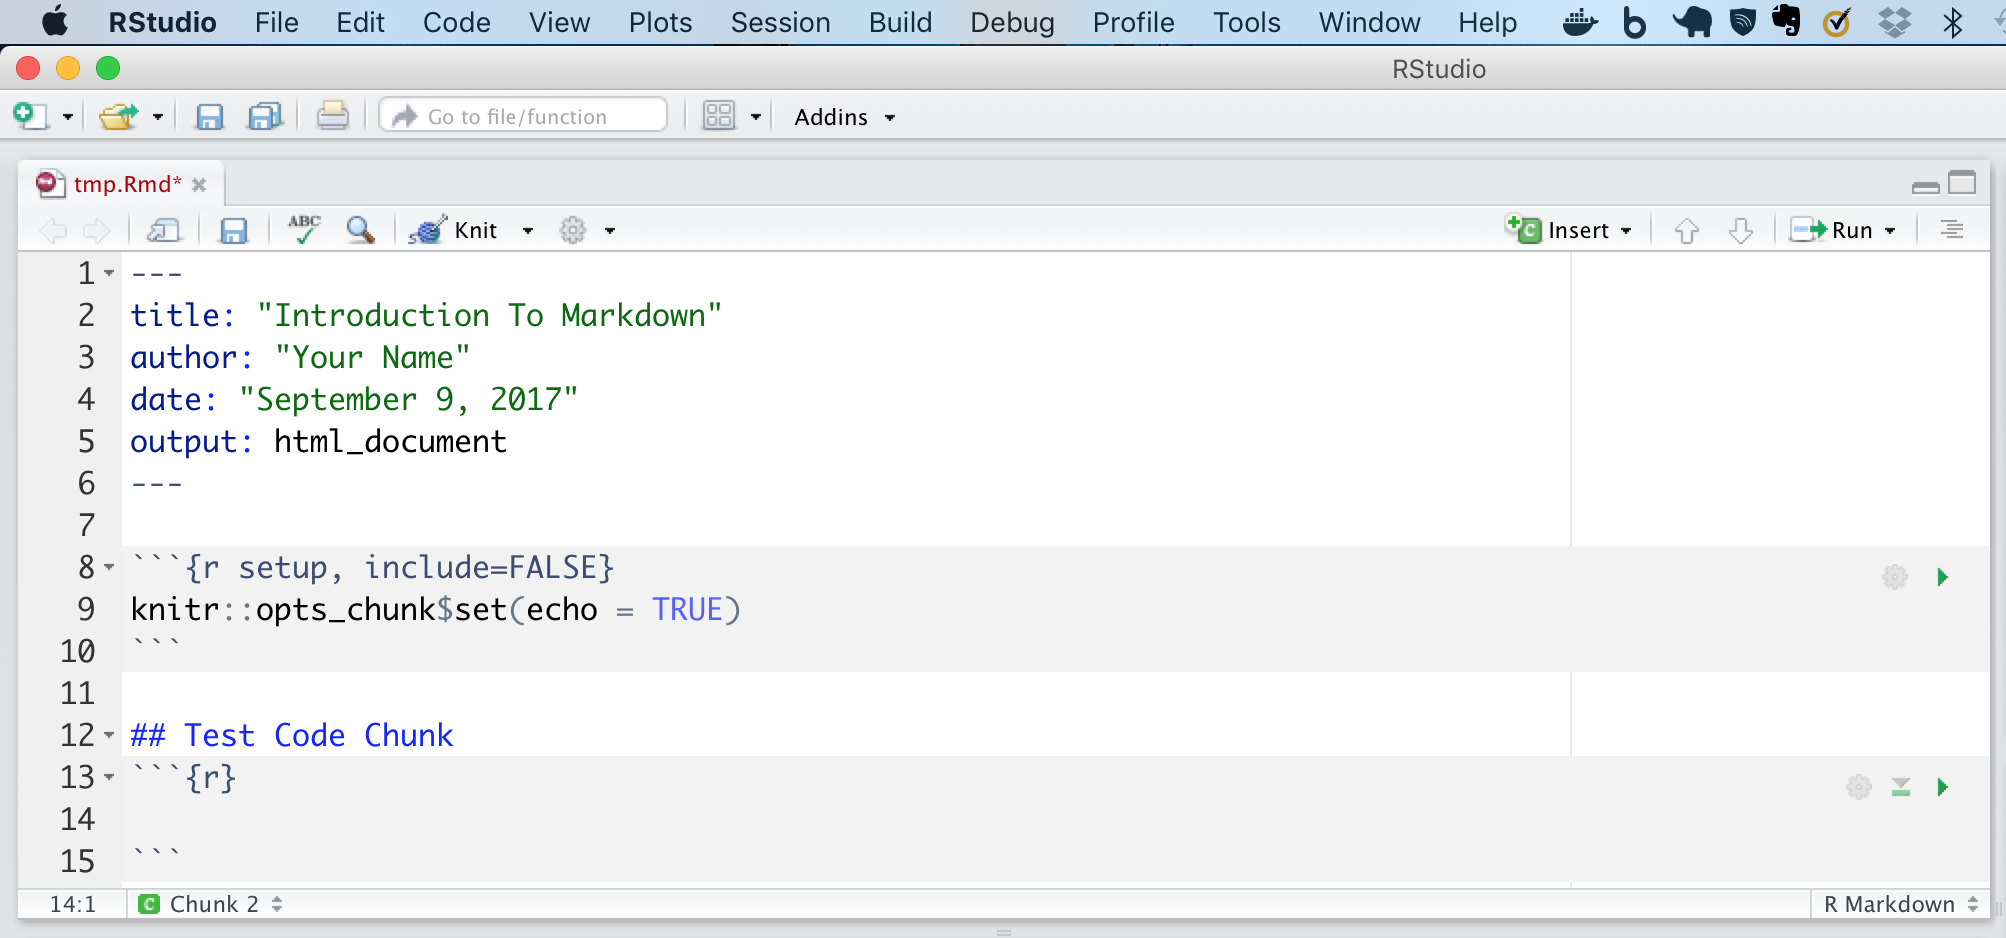
Note: you use “include=FALSE to have the chunk evaluated, but neither the code nor its output displayed.
Creating a report
Now that we’ve gone over the basics of R Markdown let’s create a real (but simple) report. First, you’ll need to download the Folicular Lymphoma data set we used in the previous ggplot2 section. Go ahead and download that dataset from http://www.genomedata.org/gen-viz-workshop/intro_to_ggplot2/ggplot2ExampleData.tsv if you don’t have it.
R Markdown documents combine text and code, the text portion of these documents use a lightweight text markup language known as markdown. This allows text to be displayed in a stylistic way on the web without having to write HTML or other web code. We won’t go over all of markdowns features however it will be good to familiarize yourself with this style.
A cheatsheet for the markdown flavor that R Markdown uses can be found by going to help -> Cheatsheets -> R Markdown Cheatsheets.
As we have mentioned you can insert a code chunk using the insert button on the top right. For example as shown below when selecting insert -> R, we get a code chunk formatted for R. However you can also add parameters to this code chunk to alter it’s default behavior. A full list of these parameters is available here.

Exercises
We have created a preliminary rmarkdown file you can download here.
Fill in this document to make it more complete, and then knit it together. The steps you should follow are outlined right in this R Markdown document. You can open this file in RStudio by going to File -> Open File. An R Markdown reference is available here.
Get a hint!
Look at the R Markdown reference guide mentioned above or the cheatsheets in Rstudio.
Answer
Here is a more complete .Rmd file.
