Posts
My thoughts and ideas
Welcome to the blog
My thoughts and ideas
Often it will be informative to annotate variants with additional information in order to get a sense of a variants impact on a phenotype. One tool that makes this process quick and straightforward is the ensembl Variant Effect Predictor (VEP). This program is available both as a stand alone software program based in perl and as a web based GUI. In this module we will learn how to use VEP in both forms.
In order to use stand alone VEP we will first need to download and install perl, a high level scripting language. First let’s check if you have perl ≥ 5.10 already installed, open a command prompt “terminal” on your local machine and run the code below.
# check perl version
perl -v
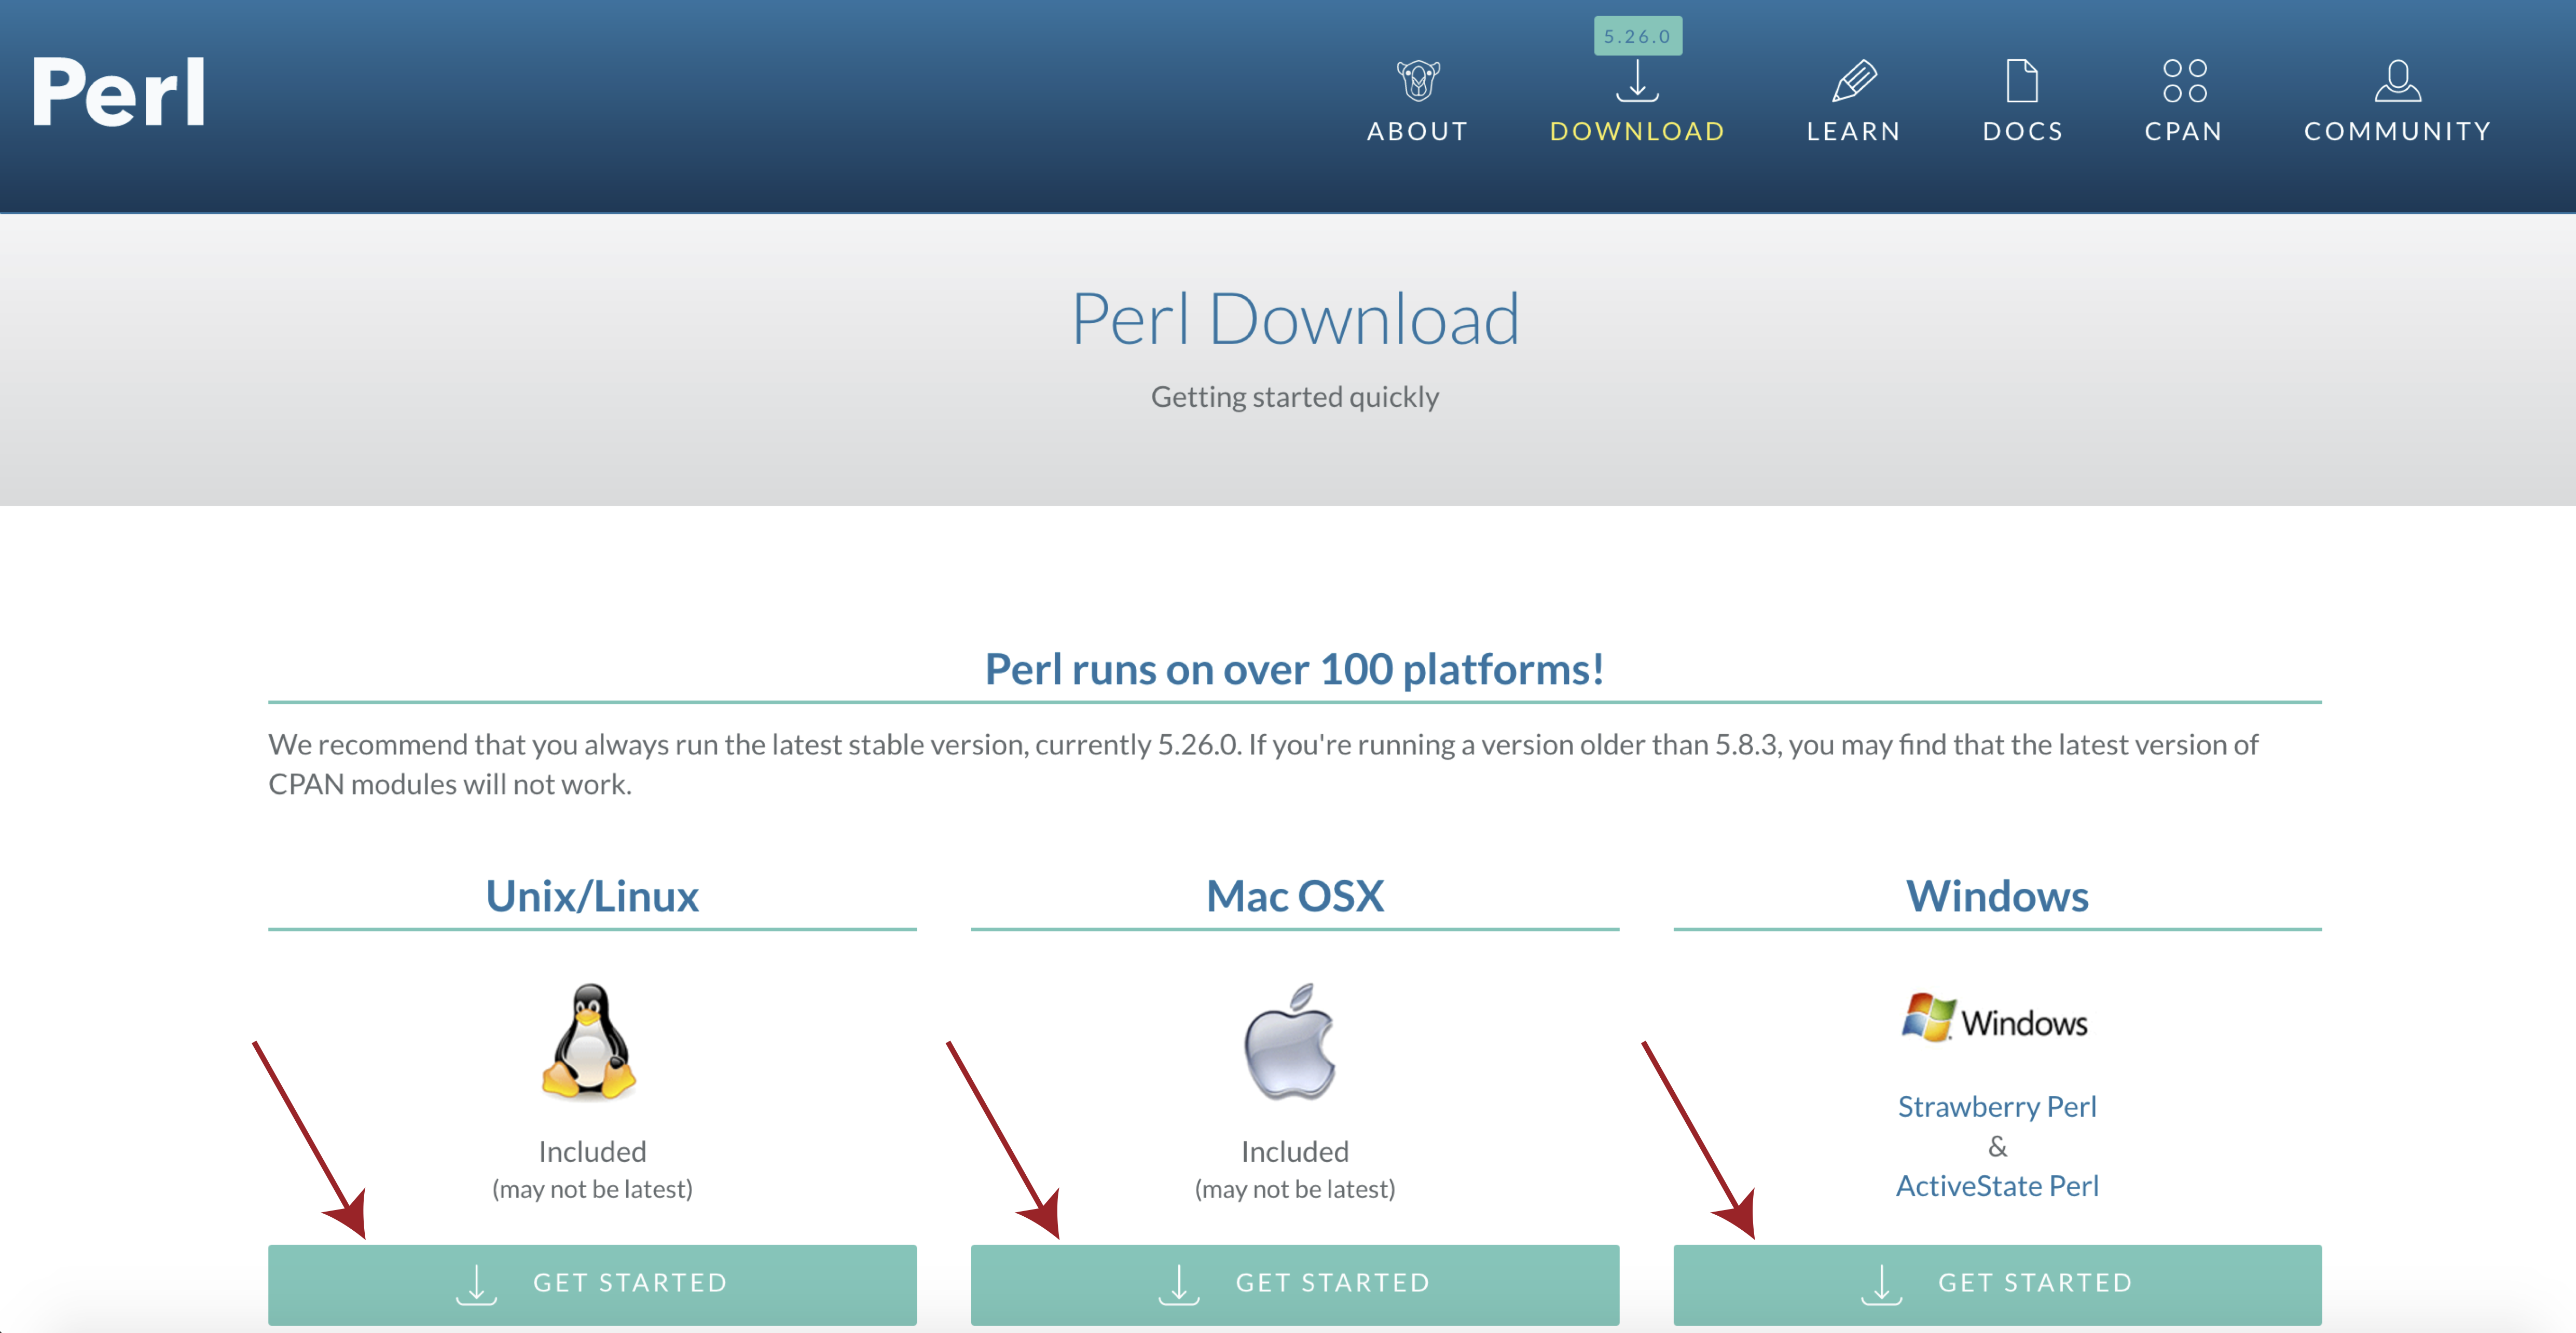
If you see a message to the effect of “This is perl 5” then you can ignore the next bit, otherwise you will need to download and install perl. To do this navigate to the perl downloads page at https://www.perl.org/get.html and select get started for your specific operating system.
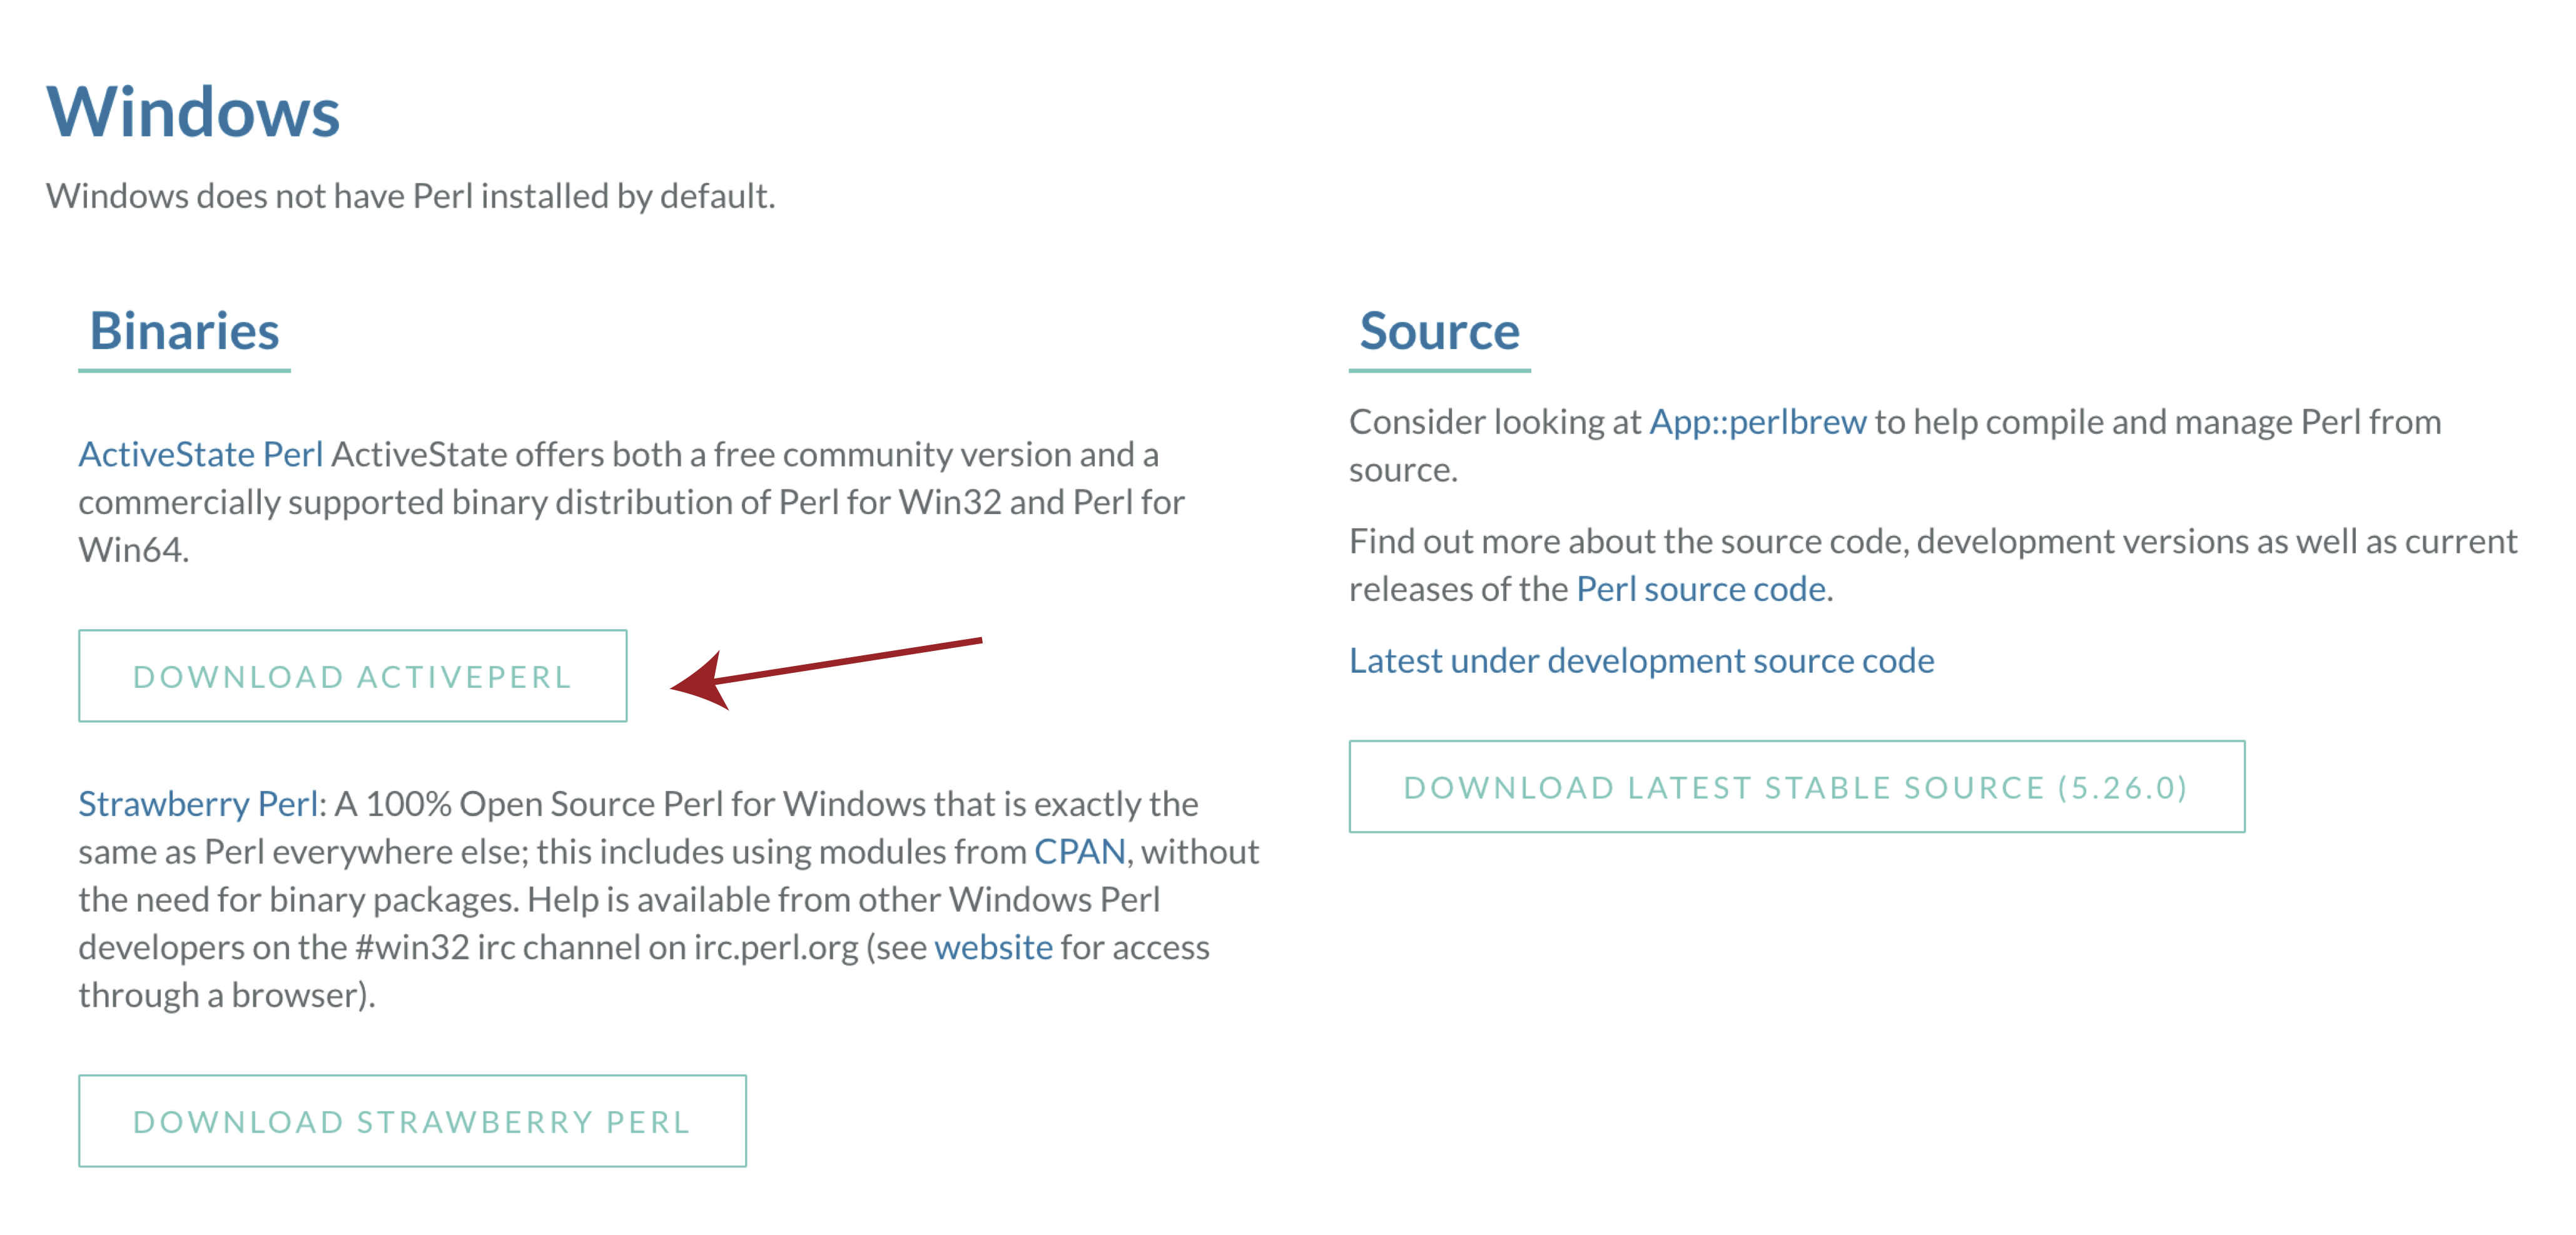
Then select activeState perl, once the installer is downloaded follow the on screen instructions and check your install with perl -v from a terminal window.
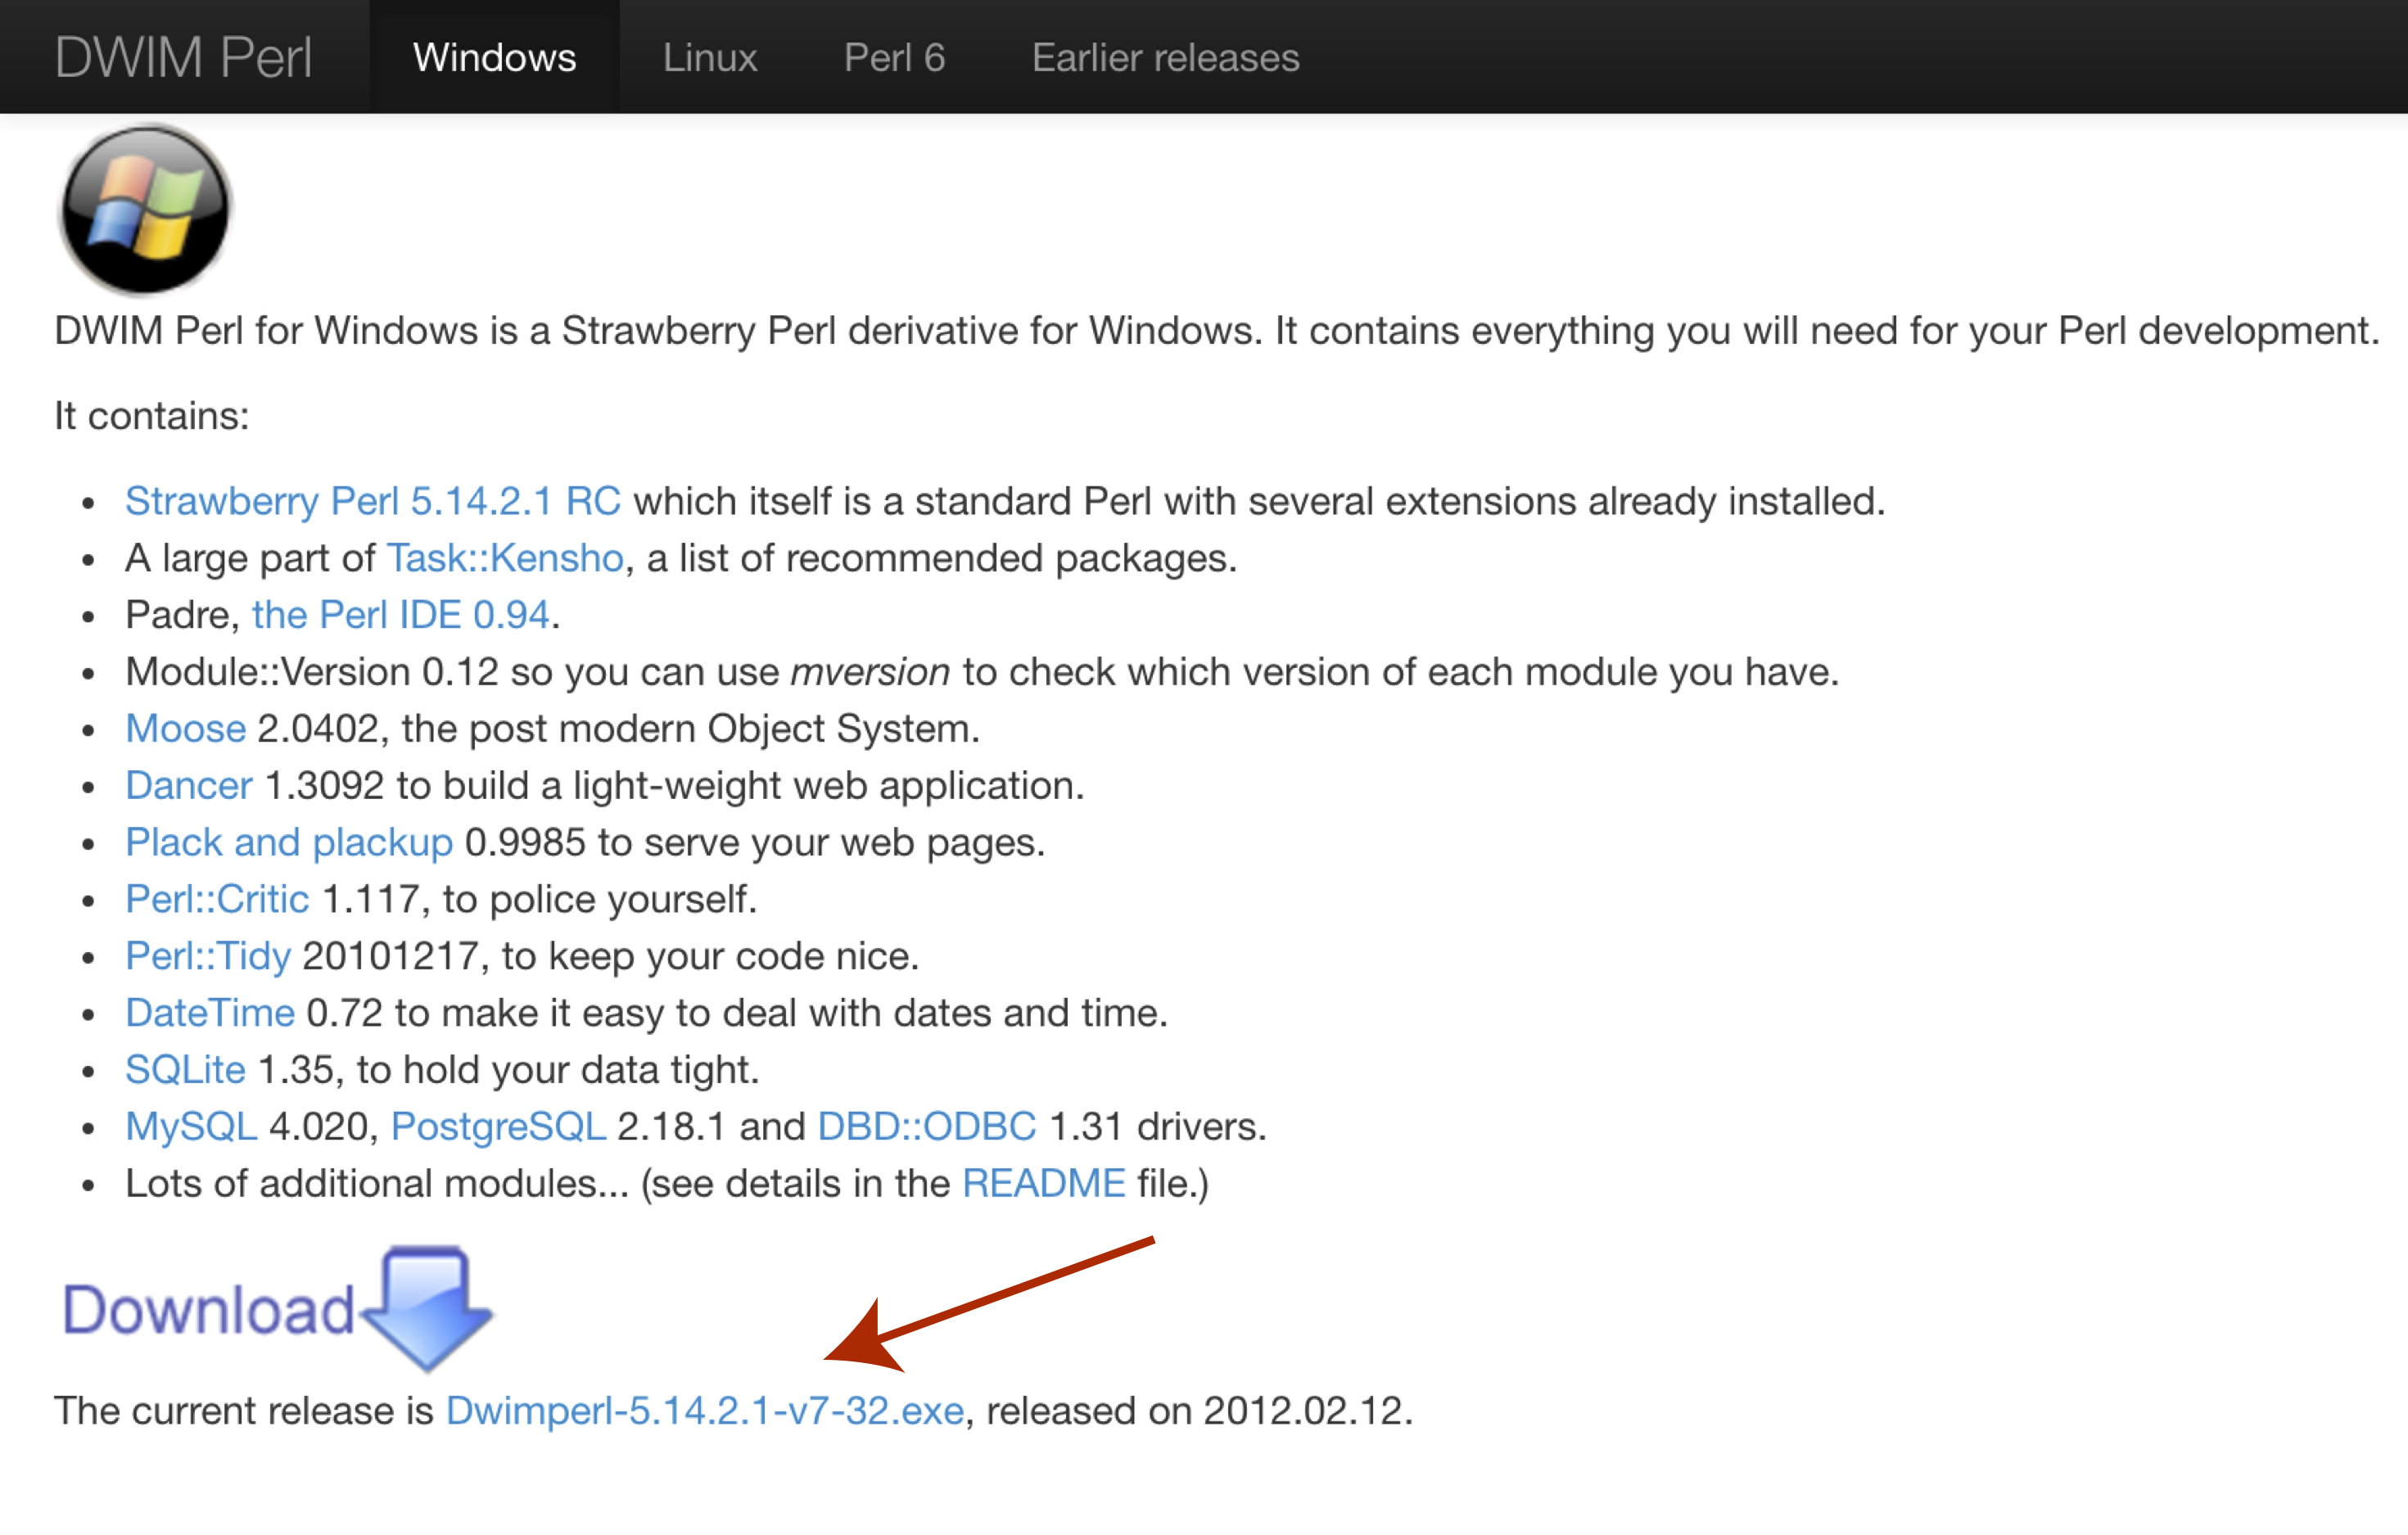
In order to use VEP on widnows we will first need to download and install a special flavor of perl called DWIMperl. Navigate to http://dwimperl.com/windows.html and download the “Dwimperl-5.14.2.1-v7-32.exe” executable at the bottom of the page. Then run the executable and follow the on screen instructions. Once finished search and open Command Prompt from the “Start Menu” and type perl -v to check that the installation was successful.
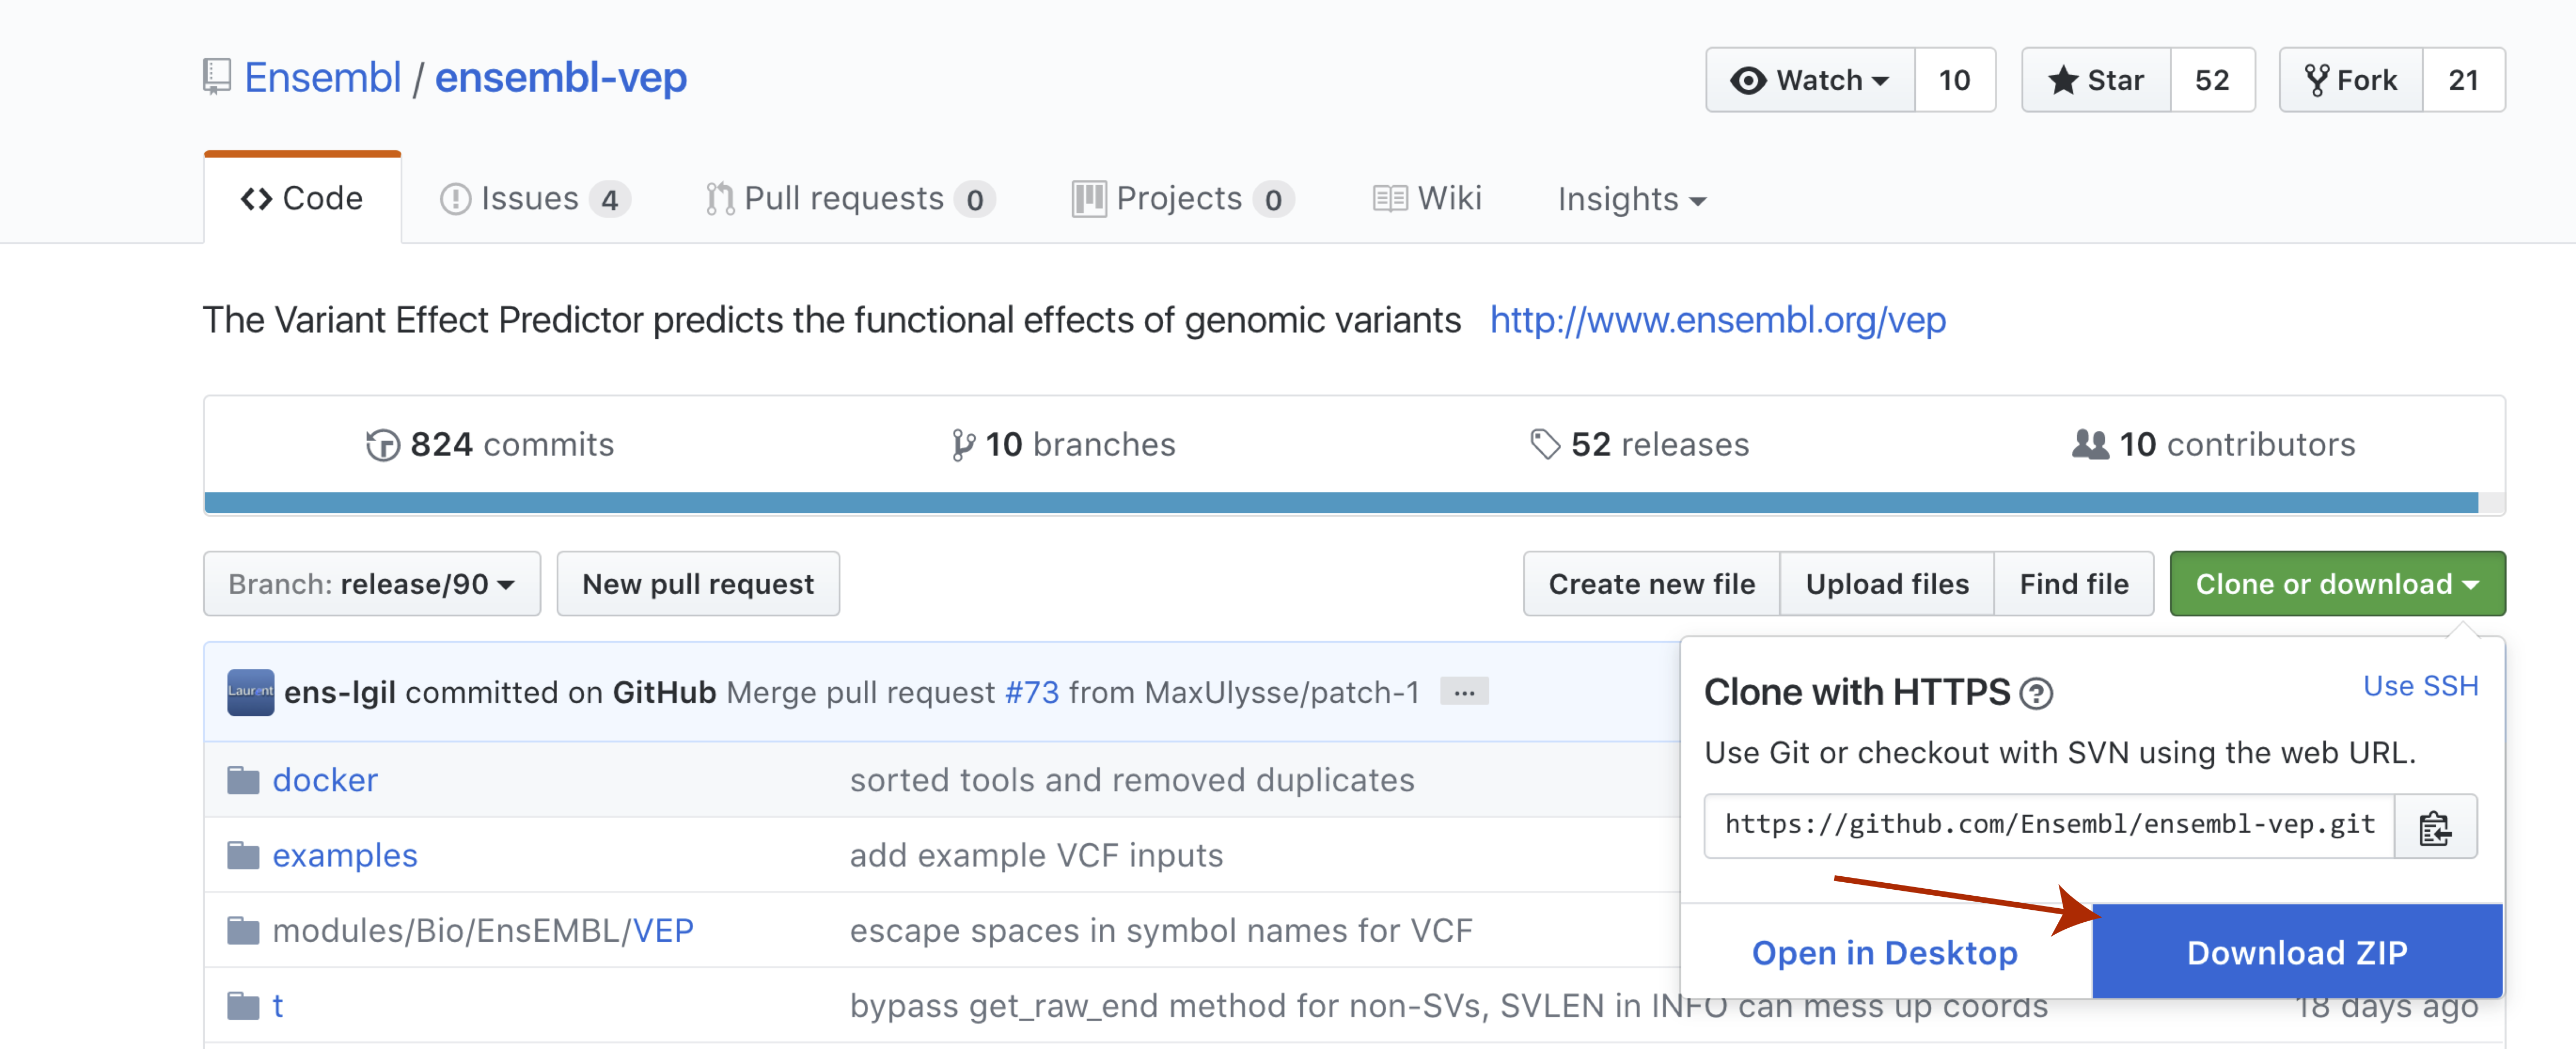
With perl now installed we can go ahead and download and install VEP itself. The recommended way to do this is by cloning the github repo available here. We won’t actually be cloning the repo, though you certainly could. Instead select the green Clone or download button to the right and then select Download Zip. Once the file is downloaded go ahead and unzip it.
Once that is complete you will need to navigate to the directory where you unziped the VEP repo and run the code below.
# change to directory where vep is
cd ./ensembl-vep-release-90

# initate VEP installations
perl INSTALL.pl --NO_HTSLIB --NO_TEST
This will start the VEP installation process. You will be asked if you want to “download local cache files”, “download fasta files”, and “install plugins”. Because of their size we will answer “no” to all these however you can always change this by re-running perl INSTALL.pl.
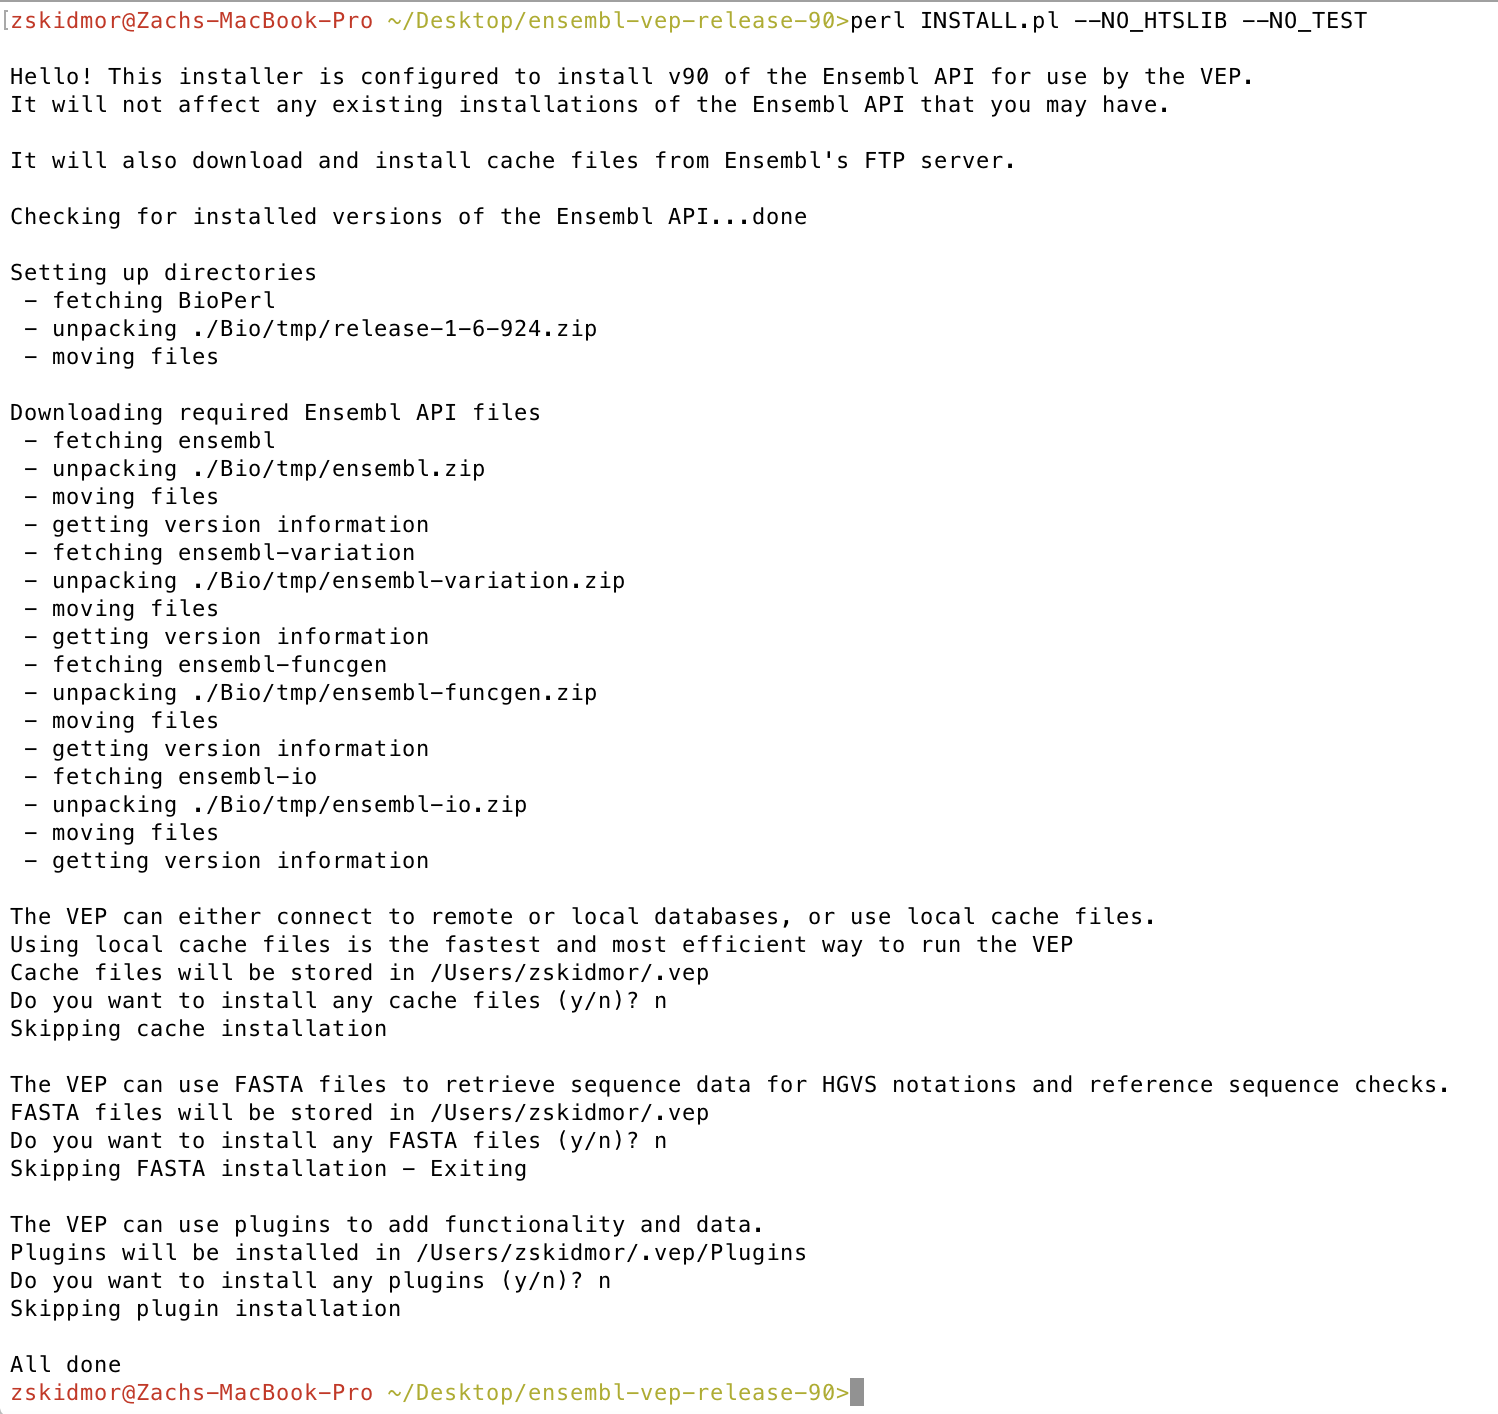
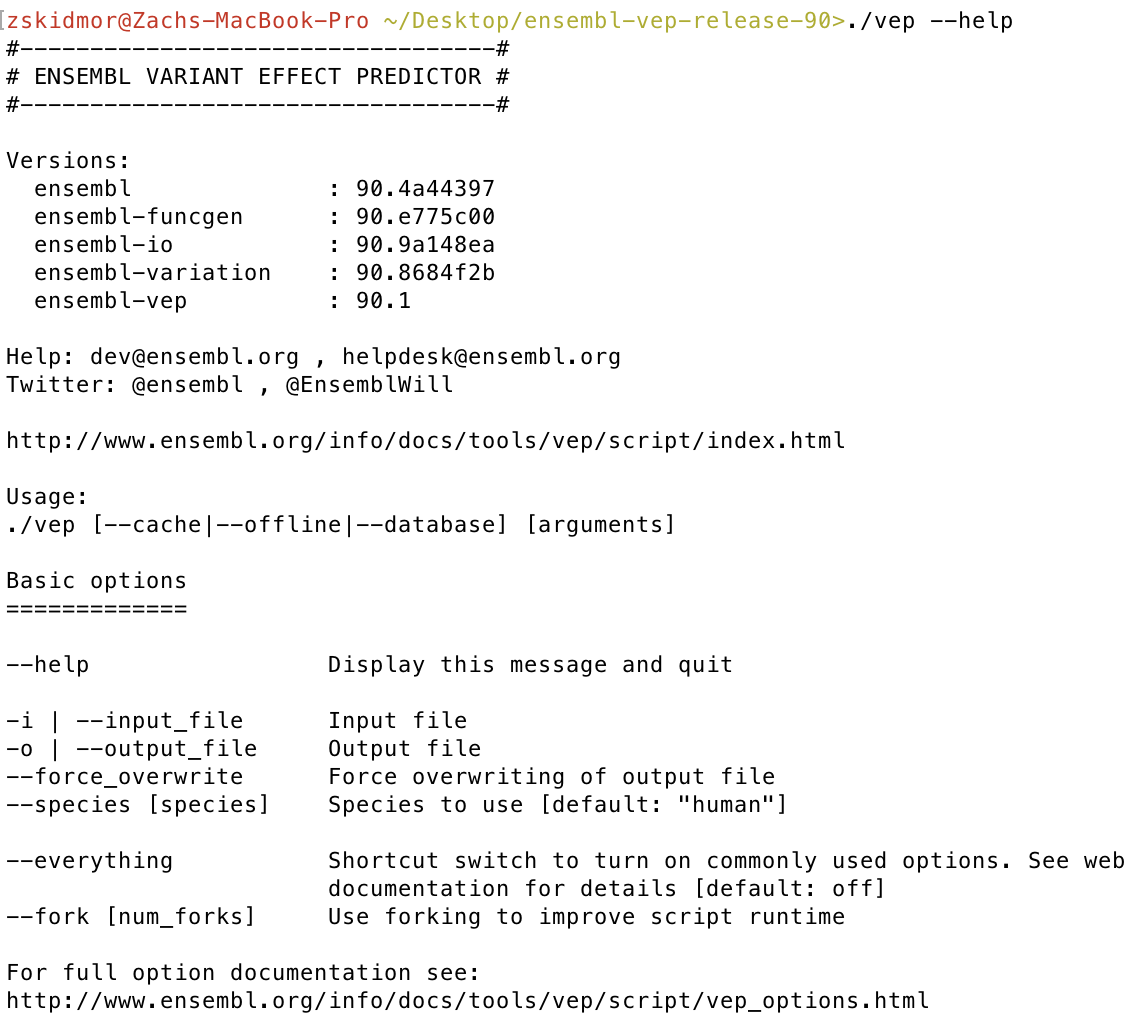
Finally let’s check our VEP installation, from the same directory you ran perl INSTALL.pl run ./vep --help. If everything went okay you should see some VEP version numbers appear.
As we have mentioned previously VEP can either be run via the command line or through a web GUI. For the remainder of this section we will be doing both side by side however we should note that using VEP from the command line is more flexible and there is a greater range of features.
To start let’s go ahead and annotate the germline variant rs1799966 using the default ensembl input format. Essentially we need to create a file with 5 columns corresponding to “chromosome”, “start” (1-based), “stop” (1-based), “reference/variant”, and “strand” (corresponding to reference/variant). You can optionally have a sixth column to add a unique identifier for this row. After creating the file variant.txt we run VEP with the following options.
NOTE: A common source of confusion is regarding the strand specified as input for VEP. This is not the strand of any specific gene/transcript. Rather it represents the strand of the reference genome and should match the reference/variant alleles specified for each variant. By convention, variant callers typically report all variants relative to the positive strand. However there may be some cases where you are starting with already annotated variants and therefore have c. notation and/or have gene- or transcript-specific strand available. Be careful not to input genomic positions with variant alleles and strand mismatched (e.g, using the positive strand reference and variant allele basesfrom the reference genome together with a negative transcript).
-i input file, the file format is automatically detected-o output file to write results--database make queries to public ensembl databases instead of looking for local copies--species species for which annotations should be obtained--everything flag to output additional annotations# make a file with a single variant in
echo "17 43071077 43071077 T/C + variant_1" > variant.txt
# run VEP
./vep -i variant.txt -o variant.anno.txt --database --species "human" --everything
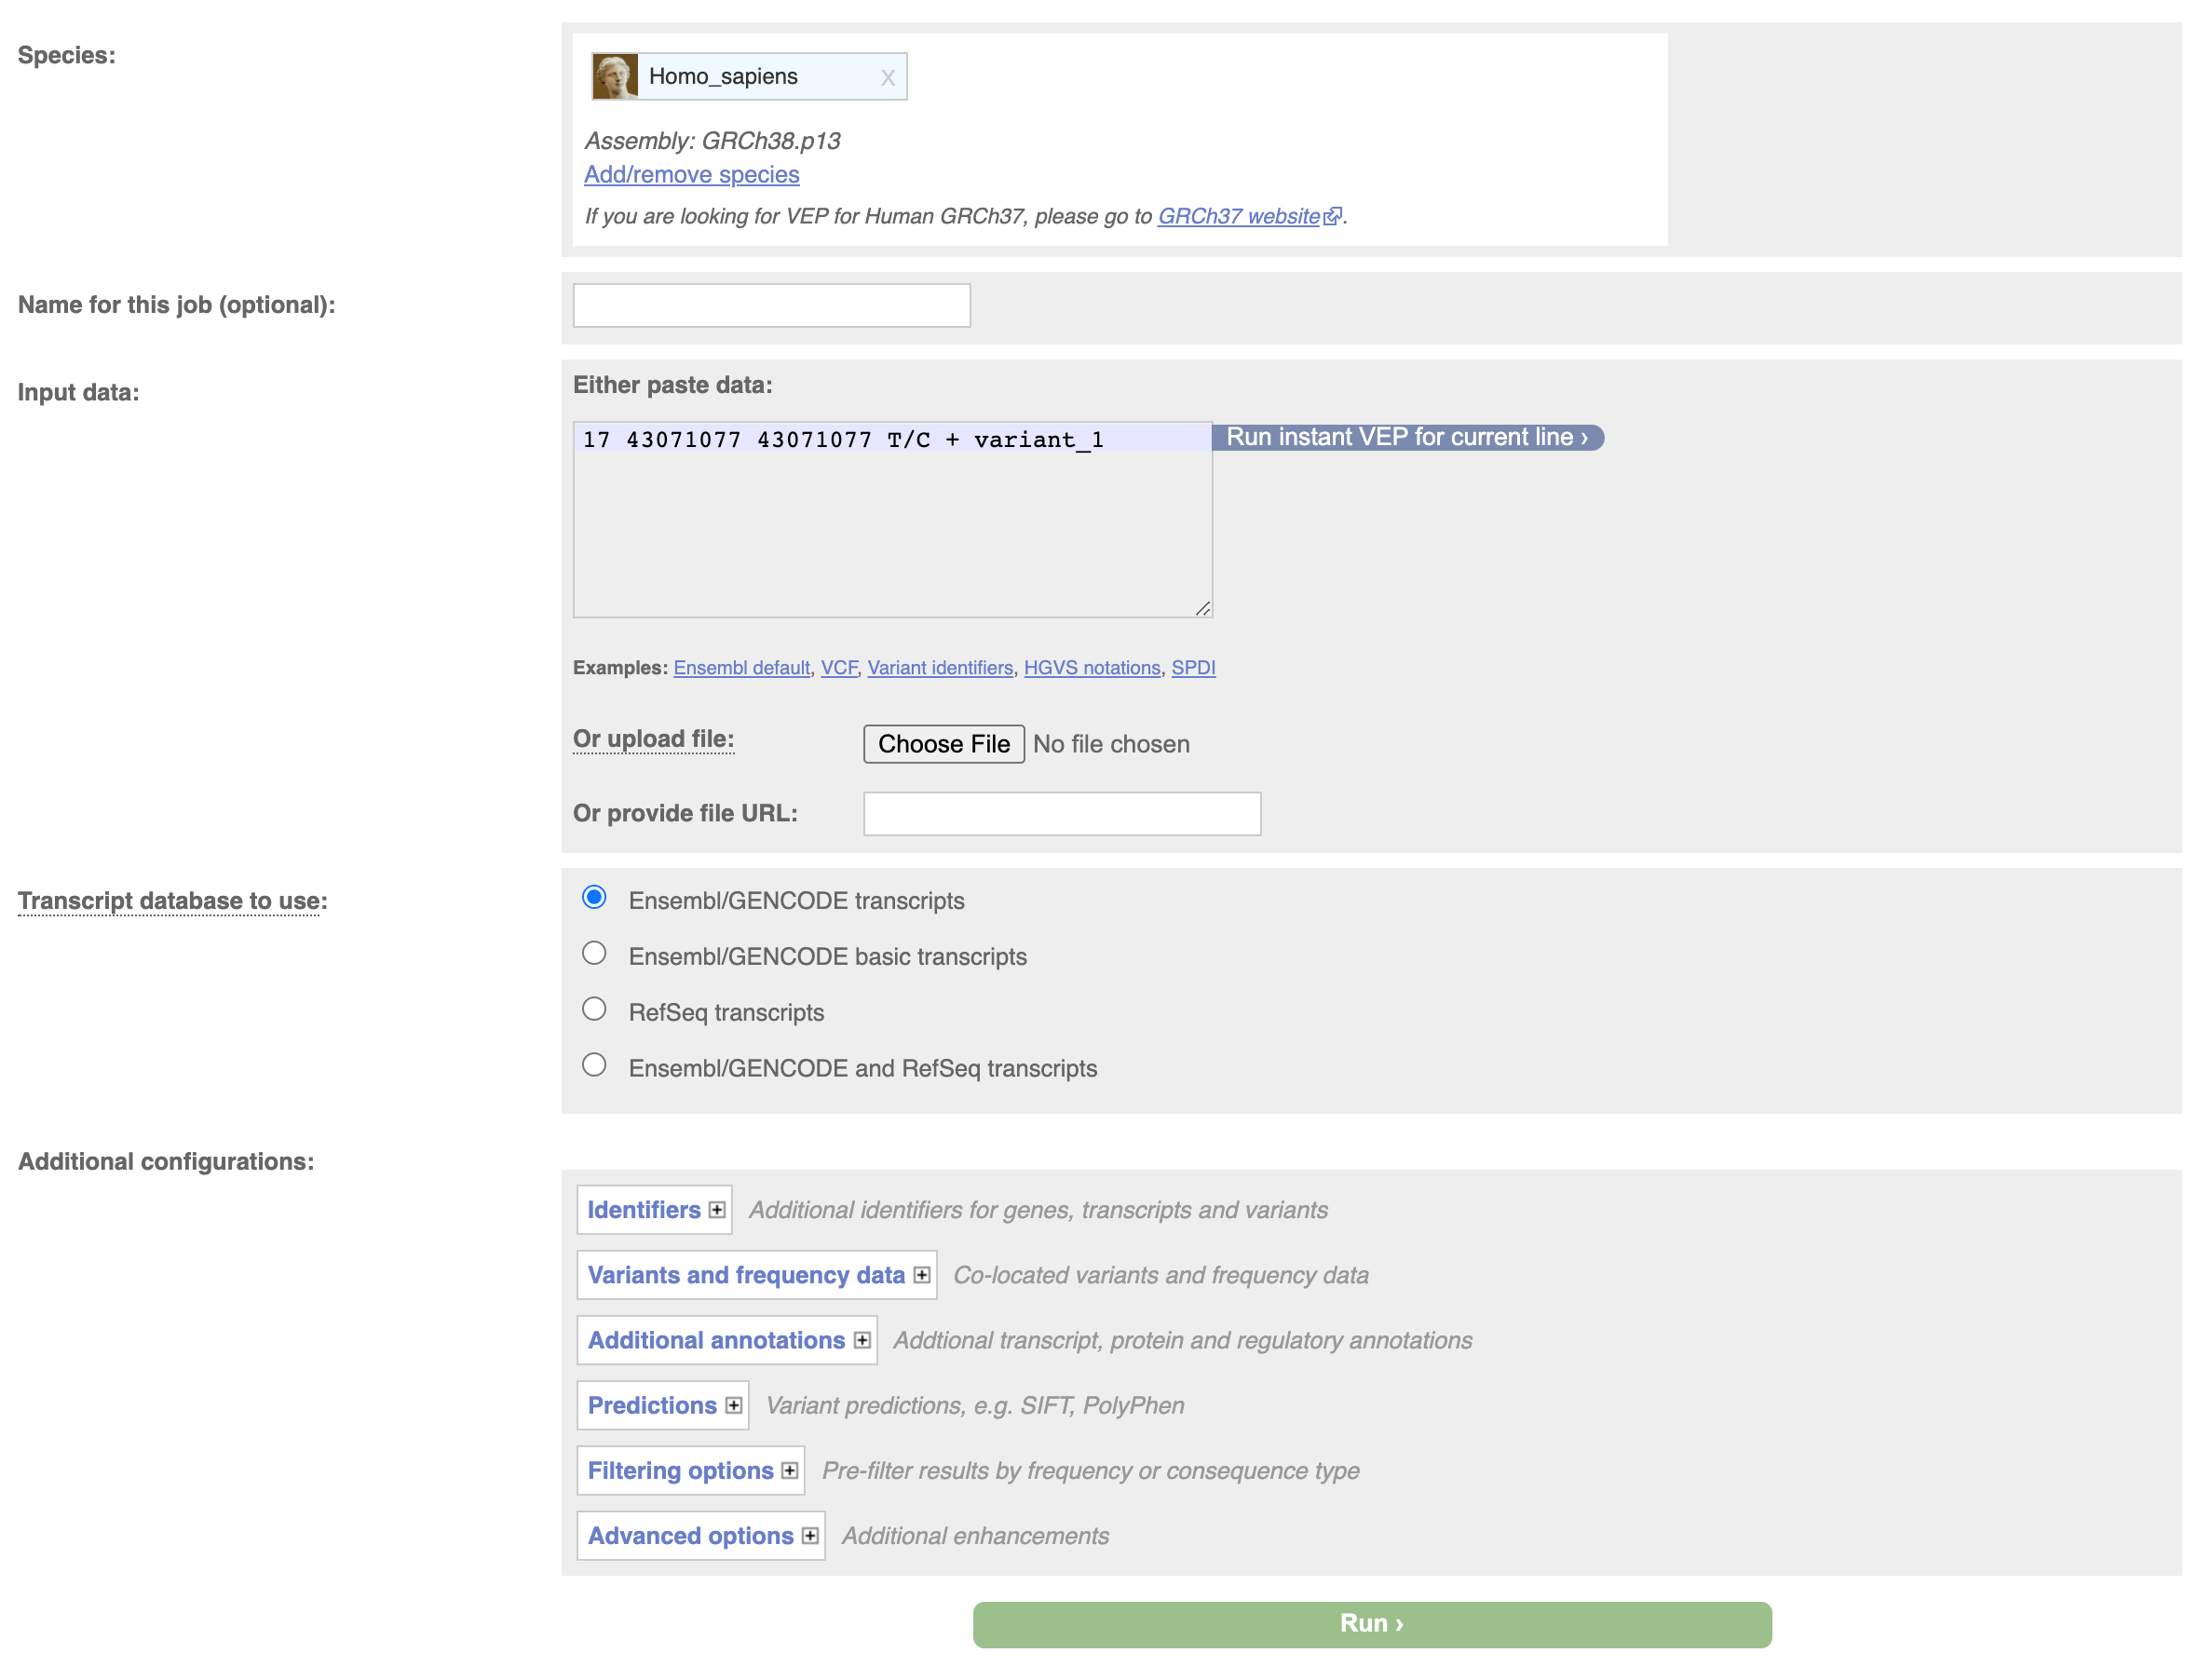
We can do the same thing through the web interface, navigate to the vep homepage at http://www.ensembl.org/info/docs/tools/vep/index.html, and click on Launch VEP.

Then input your variant and click on Run.
This will submit the job to ensembl servers, the page will refresh every few seconds. When the job completes click on view results.
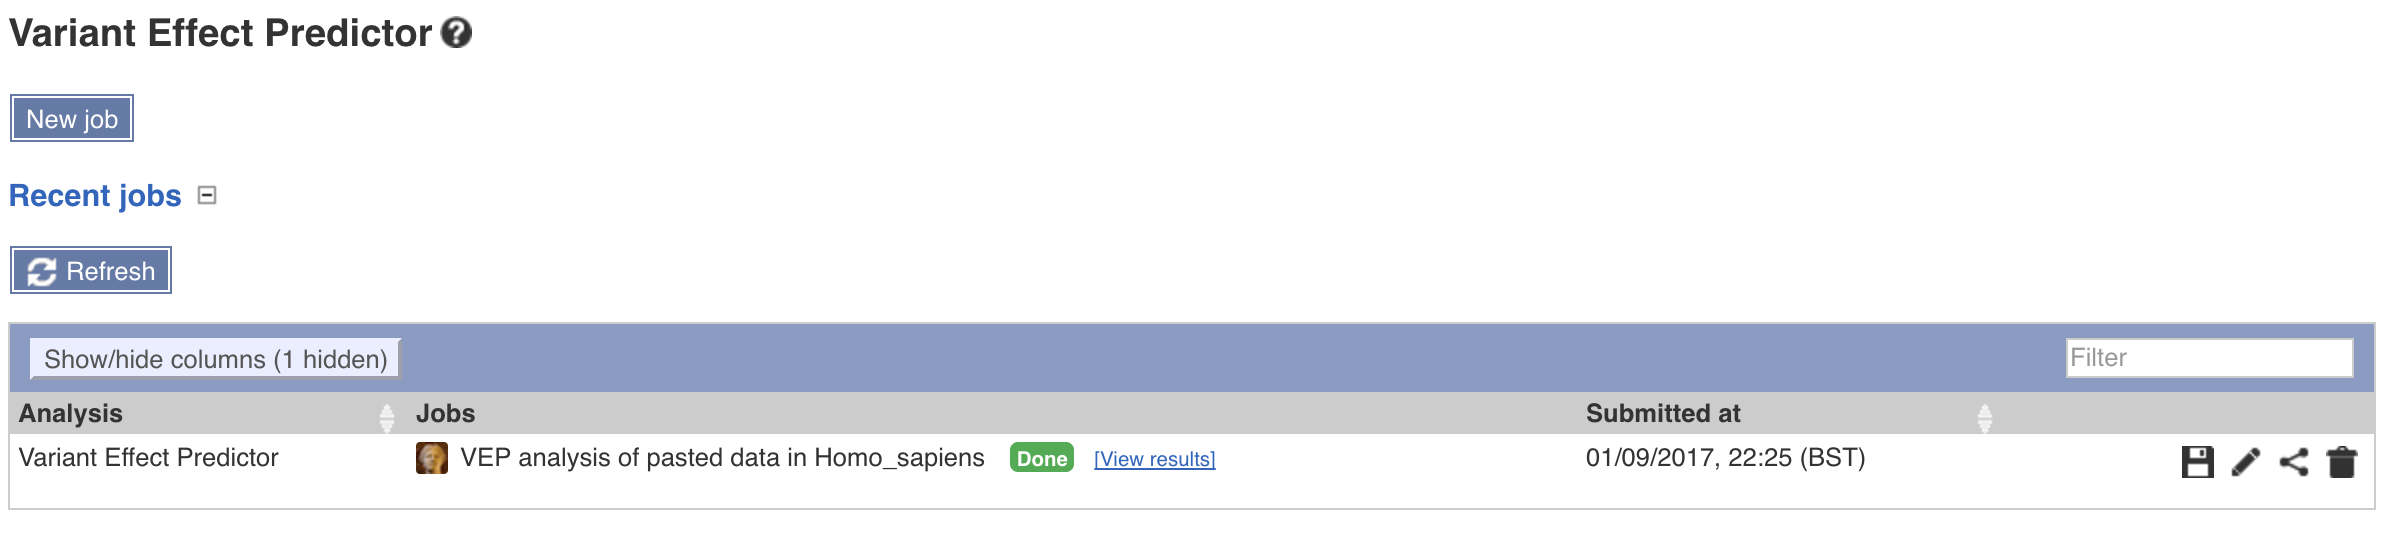
Doing so will take you to a web page where you will be able to view summary statistics, the results, and options to filter or export a file.
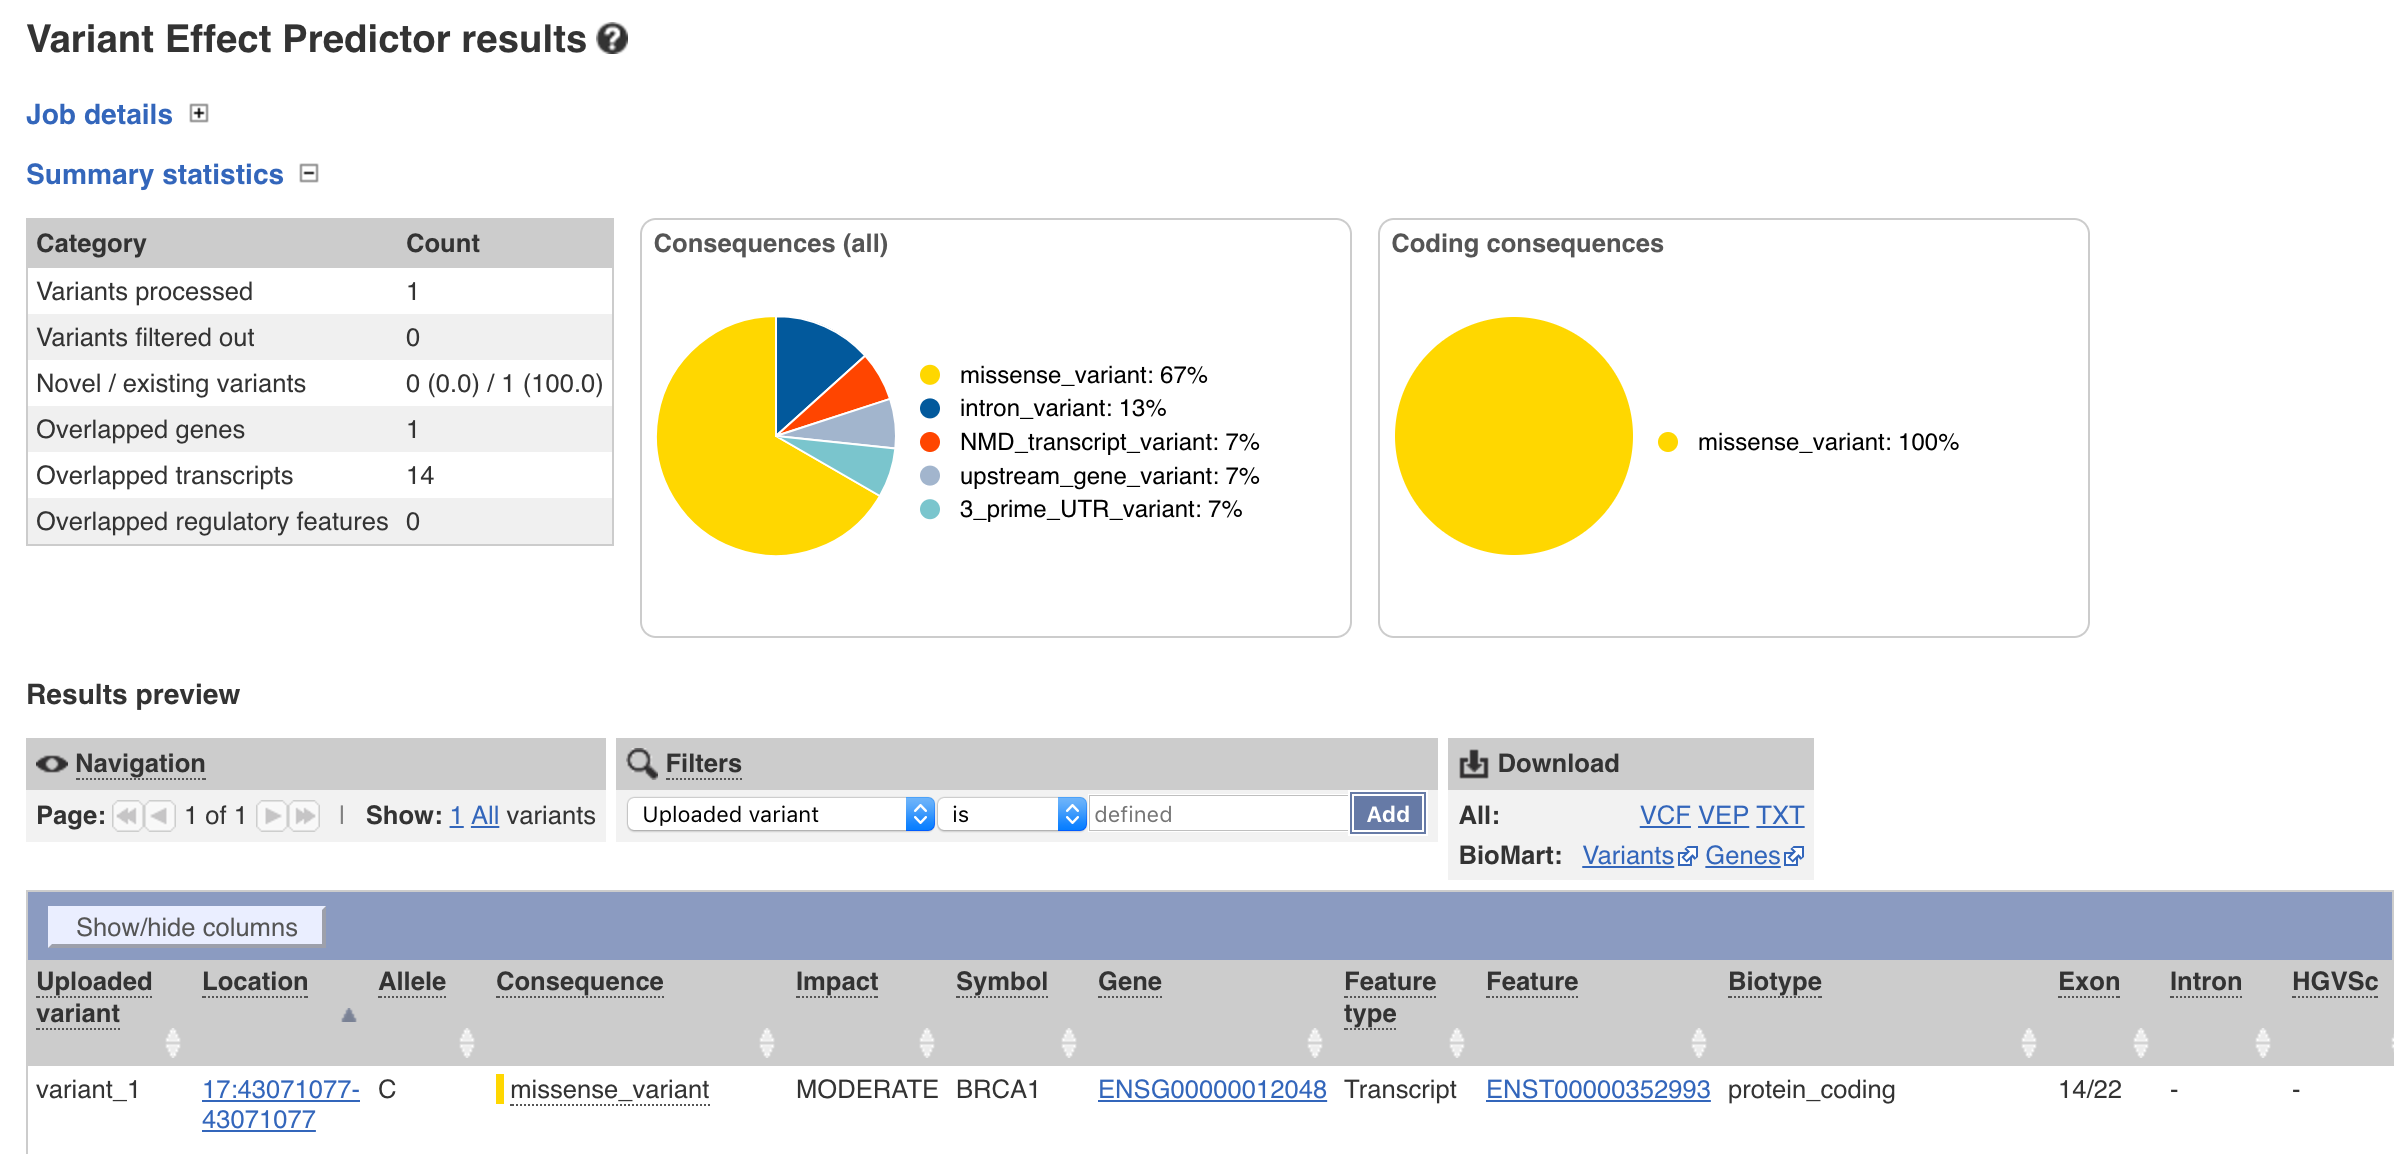
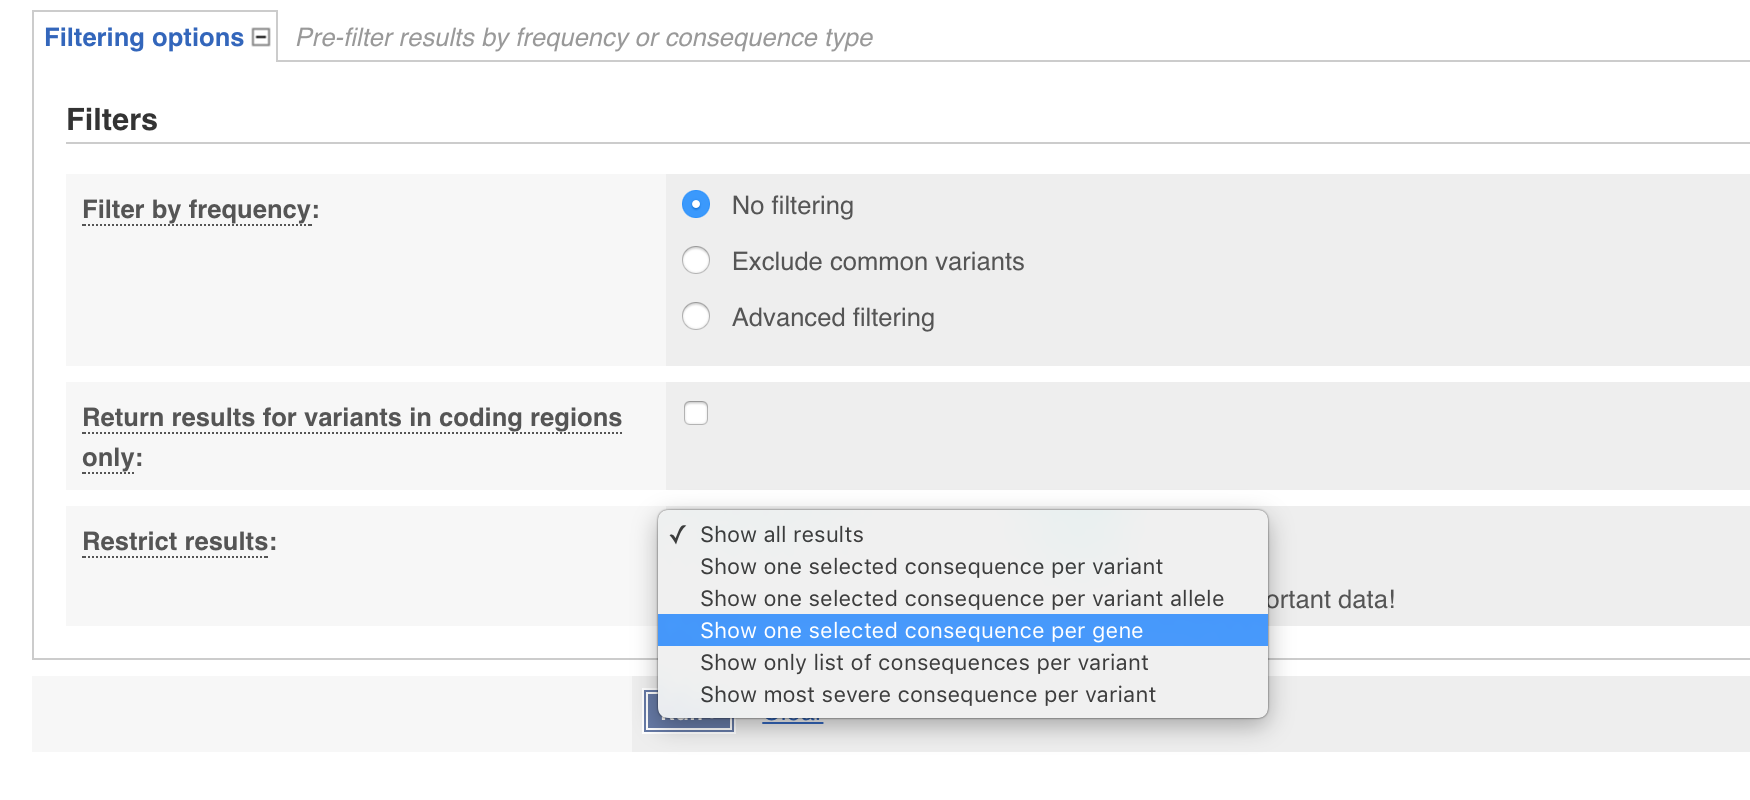
You have probably noticed from your exploration of the results that even though only one variant was supplied multiple rows were output. By default VEP returns annotations for each “transcript” and each “variant consequence”. While this is informative it is often desireable to only have one annotation per gene. We can achieve this on our command line by adding the --per_gene parameter. The same thing can be achieved through the web interface by expanding the filtering options tab and setting Restrict results to Show one selected consequence per gene. Go ahead and do that now through either the command line or web GUI.
There are many features through both forms of VEP, to many to cover in it’s entirety for this course. However extensive documentation for the web based version is available here and the stand alone perl script available here.
Now that you have an inital VEP result try and answer a few questions about your data. If you need help in understanding a certain column hover over it with your cursor or look at the VEP documentation available here.
What is the maximum allele frequency observed for this vairant in the 1000 genomes european population?
Answer
0.3598
In what gene is this variant located?
Answer
BRCA1
What is the amino acid change for this variant?
Answer
S/G